Remember To Make Memories At The Table

Remember To Make Memories At The Table

Nonna used To Say...

Got Agita? It's Not What You Eat; It's What Eats You


Wednesday, November 4, 2020

SCONE sweet home

My mom, Eugenia, was almost 98 yrs old when she died. She was an amazing woman with an amazing legacy...and an amazing zeal for life. One of her joys...her family waking up to the scent of baking. Scones! Triangular treats... melt in your coffee, good. I realize, now, how I took these small tokens of love for granted. Always thinking those smells would be in the air, the coffee pot always warm and Mom always there. Things change, but traditions need not. A new generation enjoys the scent of scones, the warmth of family and the taste of love...passed down by a woman, a lady, a hero of the Greatest Generation. Thanks, Mom💕

This recipe is the perfect chilly morning kiss. My sister, Joan Marie, is the go-to sister for these breakfast-anytime treats. Just a sprinkle of cinnamon and a shake of sugar. Not a fan of raisins? Try chocolate chips, blueberries any favorite add-in.  Enjoy!


Scones
3 cups AP flour
3/4 cup white sugar
5 teaspoons baking powder
1/2  teaspoon salt
3/4 cup butter (stick & a half) cold
1 egg, beaten
1 cup milk
1/2 cup raisins or favorite add-in 
extra sugar
cinnamon

Preheat oven to 400 degrees/ Lightly grease 2 baking sheets
In a large bowl, combine flour, 3/4 c sugar, baking powder & salt. Blend well. Add raisins. Blend. Cut in butter. Mix egg with milk in a small bowl. Stir wet mixture into flour mixture until moistened.
Turn dough onto a floured surface and knead briefly. Add a bit more flour if too sticky. Divide dough into 2 pieces. Shape into a round about 1/2 inch thick. Cut each round into 8-10 wedges. Place on prepared cookie sheets. Sprinkle each wedge with white sugar and cinnamon. Bake 15 minutes or until golden. Yields approx. 18-20 scones.

remember to make memories at the table

Saturday, February 21, 2015

Oats & Honey Bread: No Knead Method


This, so far, is my favorite bread. I adore the Rustic loaf especially with sesame seeds, but this.... This is an everyday bread. It's softer inside but still crusty. The honey adds a kiss of sweetness.  A bit more honey and a scant T of cinnamon and it becomes more a dessert bread. Just as it is, I eat this as dessert with butter (pop in microwave for 10 seconds) and smeared with jam. Hmmmmm. It's great for sandwiches, too.

The recipe is the basic No Knead recipe with 2 add ins: oats & honey. To help the extra oats stick to the top of loaf, On the second rise: I spray a non-stick 8 inch skillet with cooking oil and then lightly spritz the pan with water. Add a half a cup of oats to pan, then put dough in pan. Now, the oats will actually be on top when you flip the dough into the hot baking vessel to bake. Remember to cover the dough in skillet with plastic wrap and towel as it rises a second time.

I'm thrilled to be able to present this recipe to you. It's a wonderful bread...tasty, soft, crusty topped, and healthy. I'd like to give a shout out to my beautiful, bread-baking diva sisters: Joan, Kaz & Paula. So happy, sorelle, that you decided to give "my" breads a try....and that you agree the recipes are easy and delicious. Mangiare e Gustare!!! Eat & Enjoy!!!
Remember To Make Memories At The Table

Oats & Honey Bread

3 cups Flour (bread flour preferred)
1 1/2 teaspoon salt
1/4 teaspoon instant yeast
1 cup old fashioned oats (plus extra for top)
Mix these dry ingredients together in a large bowl
Add: 14 oz cool tap water 
4 Tablespoons honey
Mix together until all ingredients are combined. Scrape sides of bowl with spatula. Dough will be sticky.  
Cover bowl with plastic wrap and clean cotton towel. Let rise for 8 to 24 hours. 

After allotted time, turn dough out onto a floured counter/board. With floured hands, fold right side to center, left side to center, top to center, bottom to center and form into a ball. Place dough into a prepared 8 inch skillet or into a lightly oil sprayed bowl for a second rise. Cover with plastic wrap and cotton towel.

Set timer for 1 hour. After 1 hour,  put baking vessel with lid (no plastic knob) in cold oven and set oven at 450 degrees for 30 minutes. After 30 minutes, remove vessel from hot oven. Either dust inside vessel with flour or use parchment paper. Dump dough into vessel with oats on top. Give pot a shake and snip top of dough in three spots with a scissor. Cover with lid and bake for 30 minutes. Uncover and bake 5-10 minutes until crust is desired color. 


Pin It
Please resist cutting into hot bread...it will make the inside gummy (right, Joan?)

Friday, January 16, 2015

Olive Bread: No Knead Method

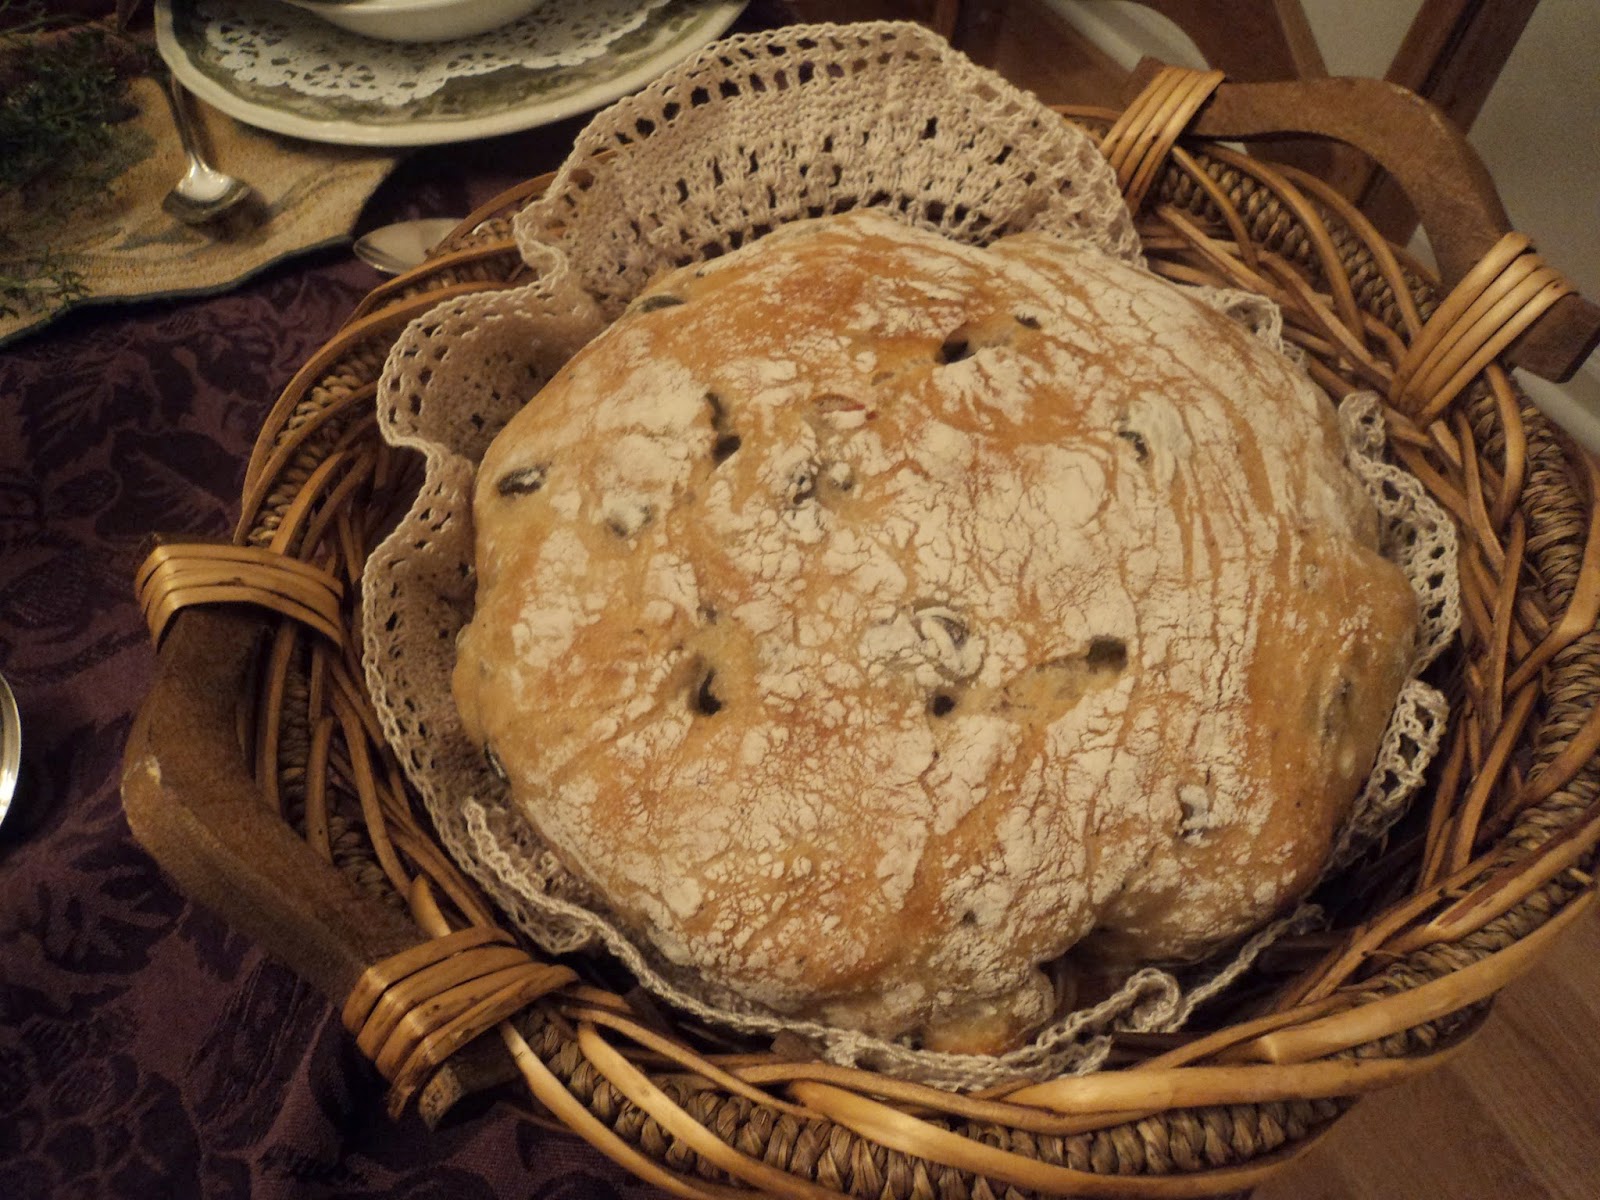
Three types of olives go into this simple loaf of bread. It is another No Need To Knead loaf that requires nothing more than flour, water, yeast, salt and olives. Any baking vessel is acceptable as long as it can take a high oven temperature. The lid, too! No plastic knobs. Rummage around the dark corners of your kitchen cabinets....I'm sure you'll find a Dutch Oven, Corning Ware casserole dish, Pyrex, or a crock pot inner ceramic liner. Remember, you need a heat resistant lid. Can't find it? Use heavy aluminum foil. Be careful not to burn yourself. I've invested in oven gloves that can withstand temp up to 500 degrees. If you want to use a kitchen towel to cover the dough, it must be a cotton towel not terrycloth. I believe my towels from Walmart are called flour sack kitchen towels. Parchment paper to prevent sticking and to lift hot loaf out of vessel is a good investment BUT not necessary. A hard shake will allow the loaf to slip out of baking vessel.  I suggest using Bread Flour (also called strong flour) rather than All Purpose Flour...but again, the bread will still be delicious no matter what flour you use. Be sure that the yeast is fresh and is instant yeast. After tasting your first slice of this homemade bread, you'll be a Bread Baking Diva! There are so many varieties...cheddar cheese, oatmeal honey, jalapeño, chocolate, cinnamon raisin, multi-grain, AND hot dog and hamburger rolls, ciabatta rolls for sandwiches. The possibilities are endless! Next bread recipe: Oatmeal Honey Cinnamon Loaf.

Putting the ingredients together for the first rise takes 10 minutes. Mix it together before you settle in for the night and you can bake it in the morning. Or mix it together in the morning for a fresh loaf with supper. Having guests over....How about Super Bowl Sunday?....A Cheddar Cheese loaf alone or with a bowl of chili OR an Olive Loaf drizzled with good olive oil & a sprinkle of salt will be the hit of the party. Need a gift? What host wouldn't love a warm loaf of bread? Go Crazy! Go Homemade! Go and bake this wonderful bread. And Remember To Make Memories At The Table.

Olive Bread 
Dough Rising


3 cups Flour (Bread or AP)
1 1/2 teaspoon salt
1/4 teaspoon instant yeast
12 oz cool tap water
1 small can (2 1/4 oz) Black Olives, drain well
3 oz stuffed ( pimento) Green Olives,  drain well
3 1/2 oz pitted Kalamata Olives, drain well
olive oil
1 teaspoon of dried Rosemary
OR dried Thyme (optional)

In a mixing bowl combine flour, salt, instant yeast. Mix. Then add all the chopped olives and any optional herbs you desire. Mix. Pour water into dry ingredients. Mix with a wooden spoon until all ingredients are combined. Scrape the sides of the bowl, too. This will take just a minute or two. The dough will be wet and sticky. That's it! Cover bowl with plastic wrap then a towel to help warm the bowl. Let it "sleep" and rise for 8 to 24 hours.

Generously flour work station (counter or wooden board). Flour your hands and remove dough from the bowl and fold once or twice. No kneading! Next, shape the dough into a ball by quickly folding right side to center, left side to center, top to center & bottom to center, and pat into a round shape.

Now...it must rise a second time either on floured counter with a floured, cotton towel covering dough. OR let rise in a bowl dusted with flour or coated lightly with olive oil....Or in a non-stick 8" frying pan. Cover with plastic wrap and let rise for 1 to 2 hours in a draft-free environment.

Set timer for 1 hour.
After 1 hour, place baking vessel WITH lid in a cold oven and preheat oven to 450 degrees.
Baking vessel should be in oven for 30 minutes until very hot.
Carefully remove hot baking vessel to counter.
Dust inside with flour OR place a piece of parchment paper inside vessel. Be careful not to burn yourself!
Dump dough into vessel and give it a shake.
With a kitchen scissor, snip top of dough in two or three spots.
Put lid on vessel and put vessel in hot oven.
Bake for 30 minutes.
Uncover & bake 5 to 15 minutes depending on how dark or light you want the bread to be.

Place hot loaf on a cooling rack. Restrain from cutting into hot loaf...it will make the inside gummy. Drizzle with good quality olive oil and a shake of salt. Enjoy!

Thursday, November 20, 2014

Cinnamon Raisin Bread: No Need To Knead

Keeping my promise. Here's the recipe for Cinnamon Raisin Bread. And it's wonderful. It isn't overly sugary....the raisins add just the right touch of sweetness. If you have a sweet tooth, certainly add a bit more brown sugar. Please use fresh ingredients. I think my next loaf will have golden raisins or cranraisins. After the initial bake time of 30 minutes covered, I baked the loaf only 10 minutes uncovered. It was perfectly done for my taste. This type of bread has a longer counter life than an Artisan Loaf. Having said that....it won't last long enough to go stale. So dear friends, another No Need To Knead success. Come back for the Olive Loaf recipe I hope to post in a few days. Oh, & Remember To Make Memories At The Table.
*get all ingredients and utensils ready on the counter. Read over the recipe before starting so you understand the steps. Relax, this is an easy method of Bread Baking. 


Cinnamon Raisin Loaf

 3 cups AP Flour or Bread Flour
1 1/2 teaspoon salt
1 teaspoon instant yeast
2 Tablespoons cinnamon
3 Tablespoons brown sugar
1 cup raisins
14 oz water (room temperature)

Need: 6-8 qt. Dutch Oven or any baking vessel with lid that can be put in a 450 degree oven.
2 medium bowls. Wooden spoon.  Cotton kitchen towel (not terrycloth). Kitchen scissor or serrated knife. Plastic wrap. Parchment paper (optional).

 
Blend all dry ingredients in a medium bowl except raisins. Be sure brown sugar is blended well with other ingredients and there are no clumps. Add raisins. Blend. Add water and mix with a wooden spoon. Try to blend with a light touch and not over mix. The dough will be wet and shaggy. Don't fret. Cover the bowl with plastic wrap and let dough rest 12 to 24 hrs at room temperature.
Generously flour work station (counter, wooden board). Flour your hands and remove the dough from the bowl and fold once or twice. No kneading! Next, shape the dough into a ball by quickly folding right side to center, left side to center, top to center, bottom to center and pat into round shape. Keep your hands floured. It will be sticky. Cover the dough with a flour dusted cotton kitchen towel. Let rise for 1-2 hours until it doubles in size.

Set timer for 1 hour. After one hour, place baking vessel with lid in cold oven and preheat oven to 450 degrees. Baking vessel should be in oven for 30 minutes until very hot. Carefully remove hot baking vessel to counter, dust inside with flour if not using parchment paper, and dump dough into baking vessel seam side up. Give pot a shake. With a kitchen scissor, snip the top of unbaked dough in two, small areas so dough can expand while baking. Cover with lid and bake for 30 minutes. Uncover and bake 5-10 minutes for light crust or longer for a darker crust. I think 10 minutes is just right.

Restrain yourself from slicing into hot loaf. Letting the steam escape can make the texture gummy. Serve with good quality butter, jam or honey. Enjoy!
Pin It


Tuesday, November 11, 2014

Rustic Bread: No Need To Knead

Home Baked Bread.....the scent of it....the texture...the taste. It doesn't get better. Yes, it does. No Need To Knead takes all the work from bread making and just leaves the pleasure. I had been meaning to try this bread recipe for years. I not only wanted to bake a No Knead Bread but I wanted to follow the recipe by Jim Lahey of  Sullivan Street Bakery in NY. Though there are many great bread bakers, Jim Lahey is the king of this method. I also enjoy the YouTube videos on Artisan Bread With Steve. The variety of breads is endless. I was so thrilled with the final result of my first attempt that I'm headed to the store for Kalamata olives for a Mediterranean Olive Loaf.  As I write this, a batch of Cinnamon Raisin Bread is rising in a bowl.  By the end of the week, I hope to bake an Oatmeal Honey Loaf. I will post photos and recipes as I try each new bread. Eventually, I will go back on my diet.

This method is very forgiving...and the scent, texture and taste of this rustic bread is beyond my expectations. I love those air pockets...nooks and crannies that capture melting butter.
The crust is crunchy and the center chewy but delicate. The color of your crust will depend on the length of time you allow the bread to bake uncovered. Bakeware?? Any baking vessel that can stand 450 degree heat. Check the knob on lid...no plastic. A 6-8 qt. Dutch oven is perfect, but even the ceramic insert from a crock pot with lid will work. How about a clay baking dish or a glass casserole with lid? Have only small baking vessels? Divide the dough and make two smaller loaves...just check at 20 minutes baking time.  First Rising Time: most recipes call for 12-18 hours. It can be as short as 8 hrs and as long as 24 hrs.  It's according to YOUR schedule. Please don't stress. This is supposed to be enjoyable and rewarding. You can place dough for second rising on a sheet of *parchment paper. When ready to bake, lift parchment paper with dough on it and place both in hot baking vessel. Parchment paper will prevent sticking. This no fear....no tears recipe will amaze you. *the less you handle the dough the better the bread.
I'm over the moon for this heavenly rustic loaf. "Knead" I say more?

Rustic No Knead Bread

3 cups of AP or Bread flour
1 1/2 c tepid water
1/4 teaspoon instant yeast
1 1/4 teaspoon salt
olive oil (for coating)
extra flour (for dusting)

Need: Two medium mixing bowls
Wooden spoon or pastry scraper
6 to 8 qt pot with lid (dutch oven, Pyrex, ceramic)
Plastic wrap, cotton dish towels (not terrycloth)
kitchen scissor or serrated knife
parchment paper (optional)

Blend all dry ingredients in a medium bowl. Add water and blend with a wooden spoon or scraper for 1 minute. The dough will be wet and shaggy. Don't fret. Lightly coat the inside of a second bowl with olive oil and place dough in the bowl. Cover the bowl with plastic wrap and let dough rest 12 to 24 hrs at room temperature.

Generously flour work station (counter, wooden board). Flour your hands and remove the dough from the bowl and fold once or twice. No kneading!  Next, shape the dough into a ball by quickly folding right side to center, left side to center, top to center, bottom to center and pat into round shape. It will be sticky. Generously flour (flour, cornmeal, or wheat bran) a cotton towel and place the dough seam side down on towel and dust with flour. Cover the dough with
Dough Rising: Note the Bubbles
another floured cotton towel and let rise 1-2 hrs at room temperature until it doubles in size. Or dust a medium size bowl with flour and let the dough rise a second time in the bowl rather than flat on a counter. Or let rise a second time in a non-stick 8" frying pan. Just tip the pan and let dough slide into hot baking vessel when ready to bake.

Set timer for 1 hour. After one hour, place baking vessel with lid in cold oven and preheat oven to 450 degrees. Baking vessel should be in oven for 30 minutes until very hot. Carefully remove hot baking vessel to counter, dust inside with a bit of flour if not using parchment paper, and dump dough into baking vessel seam side up. Give pot a shake. With a kitchen scissor, snip the top of unbaked dough in two, small areas so dough can expand while baking. Cover with lid and bake for 30 minutes. Uncover and bake 5-10 minutes for light crust or 15-30 minutes for darker crust. If you tap the bottom of baked bread and it sounds hollow it's done.
In oven for 30 min then remove lid


Restrain yourself from slicing into hot loaf. Letting the steam escape can make the texture gummy. Serve with good quality butter, jam or honey. Enjoy!

Remember To Make Memories At The Table
Pin It


Tuesday, October 14, 2014

Crab Stuffed Mushroom


There's nothing more enjoyable than cracking and eating crabs off a table covered with newspaper. Cold beer and those few hours becomes an experience.Within that experience are the memories.

It takes me back to the times we spent in Florida with my sister, Tess, and her family. Steam pots hissed on the stove and the aroma of Old Bay scented the southern air.
My son and I continue this tradition with one day each summer dubbed Our Crab Fest. We always steam too many crabs, so I devote the following day to extracting the sweet meat from the left over crustaceans. 
There is a treasure trove of recipes that require fresh crab....my favorite is stuffed Portobello Mushrooms topped with cheese. 3-4 large crabs will yield enough meat for this recipe. Use smaller mushrooms for appetizers. A larger mushroom is a full meal. A cup of cream soup like Hungarian Mushroom soup or She Crab soup and a small salad completes the meal. My daughter-in-law, Kelly, says, "These mushrooms are awesome, Ma." Hope you think so, too.    Enjoy!

Ingredients:
3 Tablespoons butter, melted
4 Large Portobello mushrooms, washed, dried
2 Tablespoons butter
3 Tablespoons onion, chopped
1 teaspoon lemon juice
1 cup fresh crab meat
1/2 cup flavored bread crumbs
1 egg, beaten
1 cup cheddar cheese, divided
1/4 cup white wine (not sweet)
1 Tablespoon parsley
Olive oil
garlic & onion powders
salt

Rub the cleaned caps lightly with olive oil. Season mushroom caps with salt, garlic & onion powder. Set aside.

Pre-heat oven to 400 degrees. Use a baking dish large enough to hold four large mushroom caps (or two dishes) with melted butter in it.

Remove the stems from clean mushrooms and chop them. Set aside.

Melt 2 T butter in a medium skillet. Cook stems and onion until soft about 4 minutes. Stir in lemon juice, crab meat, bread crumbs, egg, parsley and 1/4 cup of cheese. Mix well.

Place mushrooms in buttered pan(s) and coat with butter.  Generously fill caps with crab meat mixture. Top each with remaining cheese. Pour wine into the pan around the mushrooms.

Bake uncovered for 25 minutes until cheese is golden brown and mushroom is tender. Serve warm.
Remember To Make Memories At The Table

Pin It

Saturday, October 11, 2014

Pumpkin Pierogies In Cream Sauce


Our community has a cooking demo class each month. Chef Renee chose Pumpkin Pierogies to celebrate Autumn. Okay, so it's still 90 degrees in Florida, but just the thought of pumpkins and gourds makes me feel cooler. This is not a difficult recipe. If you don't have the desire to make your own dough....use pre-made wonton or empanada wrappers. I'm not a big fan of sage, but this has a mild sage taste which I will admit added another dimension to the sauce.  The pumpkin spices esp. cinnamon boosts the autumnal flavors. Pumpkin puree in itself is rather bland, so the pumpkin spices enhances this farm fruit's taste. The toasted pecans in the cream sauce is amazing....silky and crunchy....mmmmm, good.

For Dough:
2 cups AP flour (extra for rolling)
1/2 cup sour cream
1/2 stick butter, softened in pieces
1/2 teaspoon salt
1 egg

Filling:

1 cup ricotta cheese
1-1/2 cups pumpkin puree
1/2 teaspoon salt
dash of nutmeg & cinnamon or pumpkin spices


Sauce:
4 tablespoons butter
1/2 cup chopped toasted pecans
1 tablespoon dried sage
dash of cinnamon
1 cup of cream (yes, real cream)

To prepare the pierogi dough, mix together the flour and salt. Beat the egg, then add to the flour mixture. Add the sour cream and the softened butter pieces and knead until the dough loses most of its stickiness (about 5-7 minutes). Wrap the dough in plastic and refrigerate for at least 30 minutes; the dough can be kept in the refrigerator for up to 2 days. Each batch of dough makes about 15 pierogies.

While dough is resting, combine ricotta cheese, pumpkin puree, salt and pumpkin spices in a medium bowl and mix well.

Place a section of dough onto a well floured surface and roll out until 1/8 inch (very thin). If dough is too thick the pierogies will be tough and difficult to cook. OR use the darn wonton wrappers!
Cut circles of dough with a biscuit cutter (2 inch circle) and fill each with a plump teaspoon of pumpkin mixture. Fold dough over and and crimp edges with a fork until sealed. A bit of water on edges might help the seal. Recipe yields about 16 pierogies.

Fill a large pot with water and a small amount of salt. Bring to a boil. Place about half the pierogies in boiling water until they float to the top. Gently remove them with a slotted spoon and drain on paper towel.

Toasting the pecans releases the natural oils and reinvigorated the taste.  To toast nuts, preheat the oven to 350° F. Spread out the nuts in a single layer on a lined cookie sheet. Place in the middle rack of the oven and toast for 10 to 15 minutes. Stir the nuts halfway through the cooking time so the ones in the middle toast as quickly as the ones on the outside of the pan.  Set aside to cool.

In a skillet, melt 4 T of butter. Add a single layer of cooked pierogies and brown on each side. Remove from pan. Don't burn the butter. Add butter as needed until all pierogies are lightly browned.
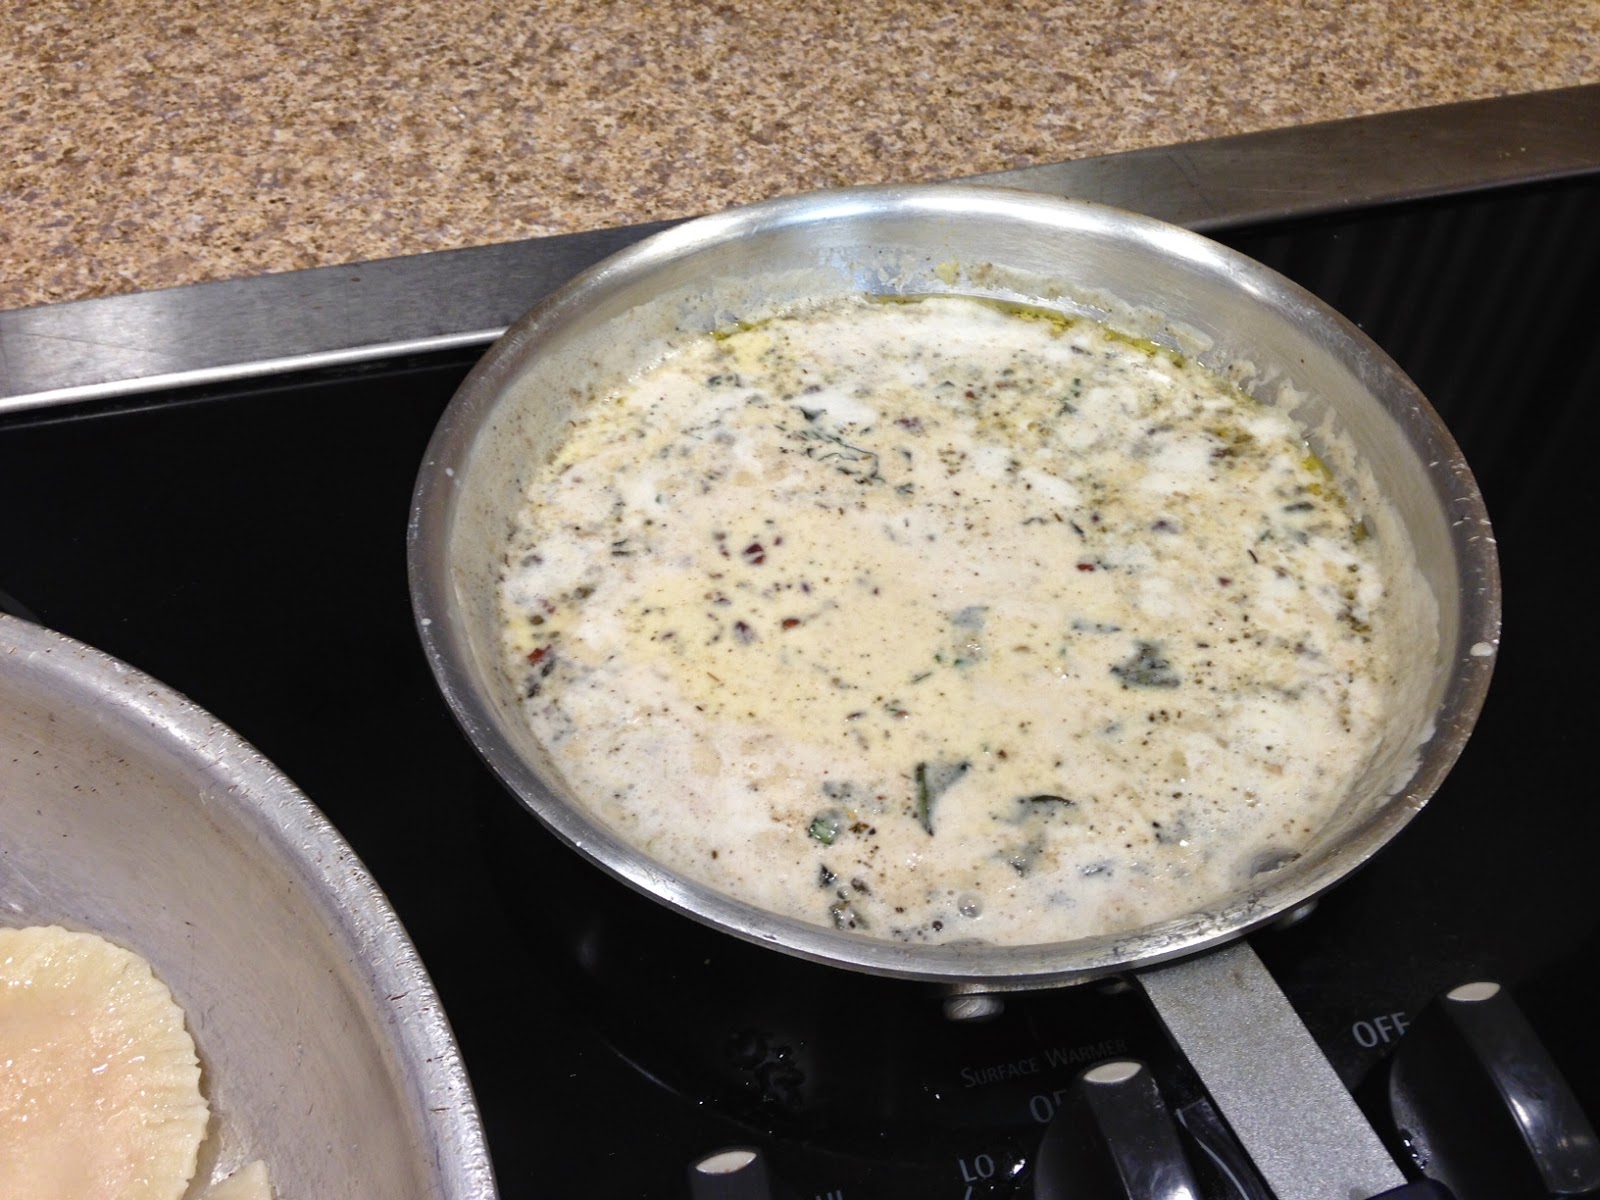
Add 2 T of butter in skillet. Add pecans, cinnamon and sage and saute for a minute then add cream and bring to a simmer. Do not boil. Serve sauce over pierogies.

Remember To Make Memories At The Table
Pin It